
Shopping list
- pattern
- 10mm, 8mm, 4mm, and 2mm EVA Foam
- 6mm Plastazote® LD45
- small foam Dowel
- Contact Cement
- utility knife
- knife sharpener
- superglue
- Hot glue
- 123 blocks
- velcro
- Adafruit’s Gemma MO
- 5V output Powerbank
- alligator clips for testing
- electrical tape or heat shrink
- Neopixels Strip
- hook up wire
- soldier and soldiering iron
- Helping Hands
- parchment paper
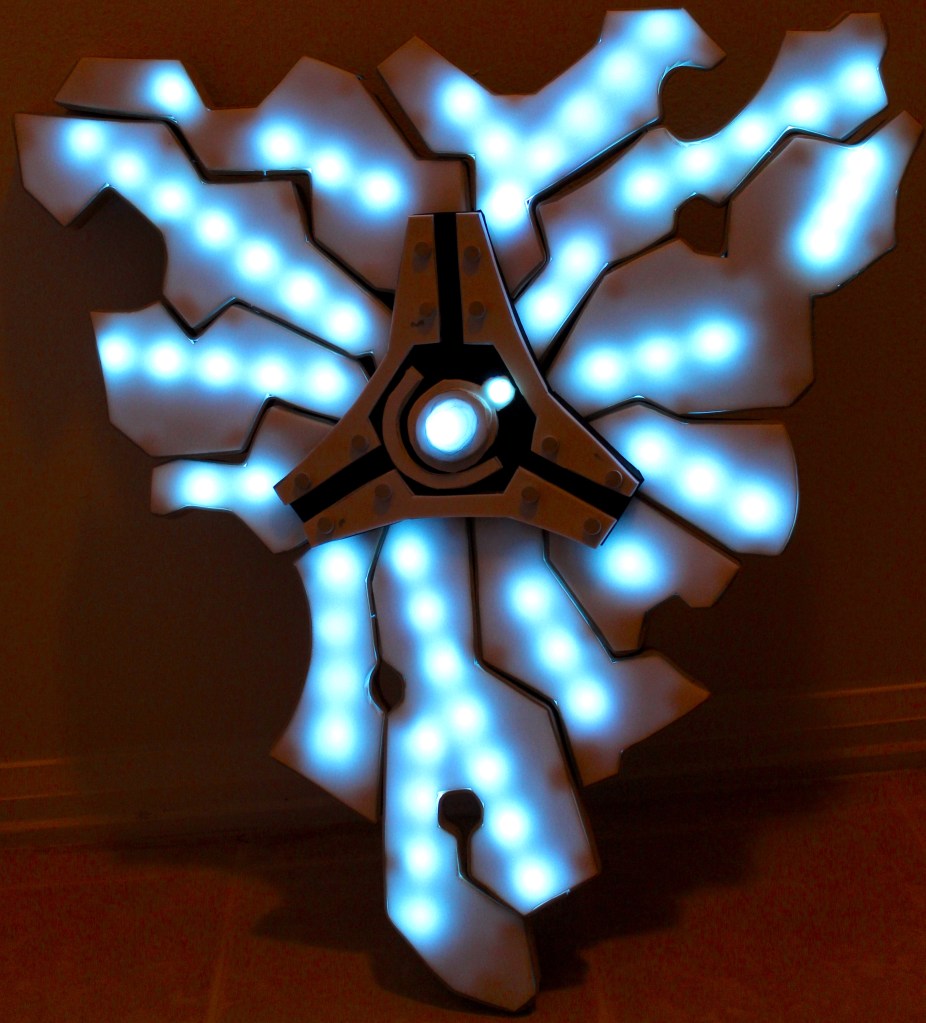
One cool thing about Legend of Zelda Breath of the Wild is how some of the gear glows. The Guardian Shield is one of those item. When I saw it in the game I knew I needed to make. This will also fit perfectly with my Breath of the Wild cosplay I plan to make this year.

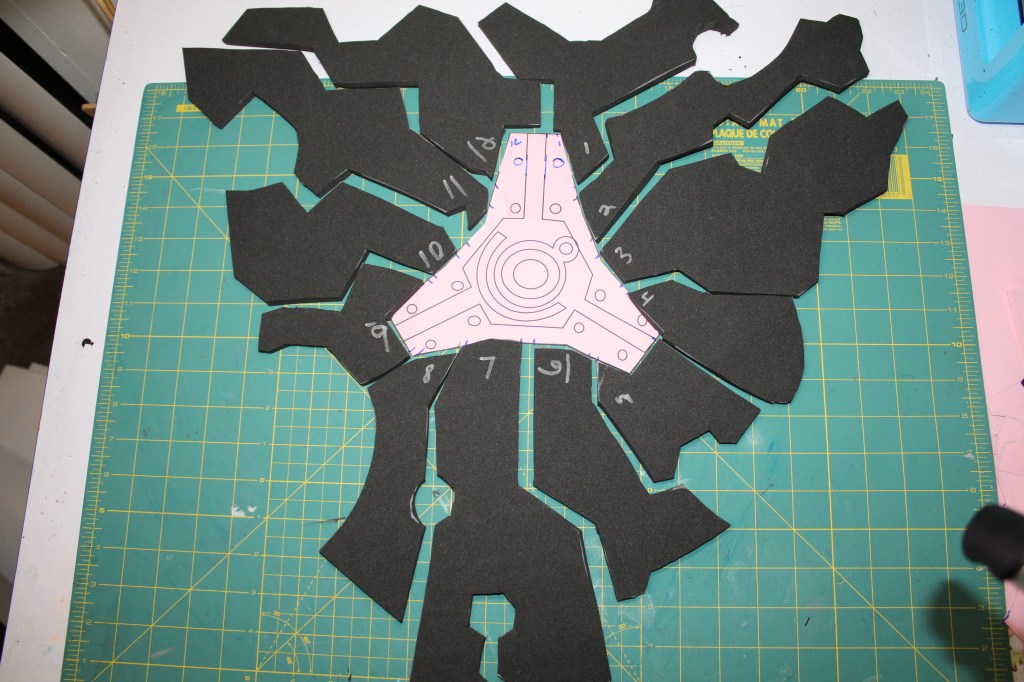

Print and tape together Pater pattern. Number your panels. include registering marks to where the panels meet the center of the shield. Cut out the back base panels from 8mm EVA foam. Cut out 3 center panels and glue them together as well.
At this point I got my Gemma MO ready. We will use this to test each strip along the way and make any adjustment if needed. I really like the Gemma MO because you can use CircuitPython to make the lights do cool things and it is really easy to test with alligator clips.
I have the code upload to my GitHub account. This code is based on Adafruit’s Logan’s Run Hand Jewel LED tutorial.
import time

import board
import neopixel

pixpin = board.D2
numpix = 7
wait = 1.4  # seconds color fade duration

# defaults to RGB|GRB Neopixels
strip = neopixel.NeoPixel(pixpin, numpix, brightness=0.8, auto_write=False)


# uncomment the following 3 line for RGBW Neopixels
# strip = neopixel.NeoPixel(
# pixpin, numpix, bpp=4, brightness=.3, auto_write=True
# )

# Linear interpolation of y value given min/max x, min/max y, and x position.


def lerp(x, x0, x1, y0, y1):
    # Clamp x within x0 and x1 bounds.
    if x > x1:
        x = x1

    if x < x0:
        x = x0

    # Calculate linear interpolation of y value.
    return y0 + (y1 - y0) * ((x - x0) / (x1 - x0))


# Set all pixels to the specified color.


def fill_pixels(r, g, b):
    for i in range(0, numpix):
        strip[i] = (r, g, b)
        strip.write()


# Get the color of a pixel within a smooth gradient of two colors.
# Starting R,G,B color
# Ending R,G,B color
# Position along gradient, should be a value 0 to 1.0


def color_gradient(start_r, start_g, start_b, end_r, end_g, end_b, pos):
    # Interpolate R,G,B values and return them as a color.
    red = lerp(pos, 0.0, 1.0, start_r, end_r)
    green = lerp(pos, 0.0, 1.0, start_g, end_g)
    blue = lerp(pos, 0.0, 1.0, start_b, end_b)

    return (red, green, blue)


# Starting R,G,B color
# Ending R,G,B color
# Total duration of animation, in milliseconds


def animate_gradient_fill(start_r, start_g, start_b, end_r, end_g, end_b,
                          duration_ms):
    start = time.monotonic()

    # Display start color.
    fill_pixels(start_r, start_g, start_b)

    # Main animation loop.
    delta = time.monotonic() - start

    while delta < duration_ms:
        # Calculate how far along we are in the duration as a position 0...1.0
        pos = delta / duration_ms
        # Get the gradient color and fill all the pixels with it.
        color = color_gradient(start_r, start_g, start_b,
                               end_r, end_g, end_b, pos)
        fill_pixels(int(color[0]), int(color[1]), int(color[2]))
        # Update delta and repeat.
        delta = time.monotonic() - start

    # Display end color.
    fill_pixels(end_r, end_g, end_b)


while True:
    # Run It:

    # Nice fade from dim light blue for 1.4 second:
    animate_gradient_fill(0, 0, 0, 52, 204, 255, wait)

    # Then fade from light blue  for 1.4 second.
    animate_gradient_fill(52, 204, 255, 0, 0, 10, wait)

    # time.sleep(1) # Use this delay if using multiple color fades


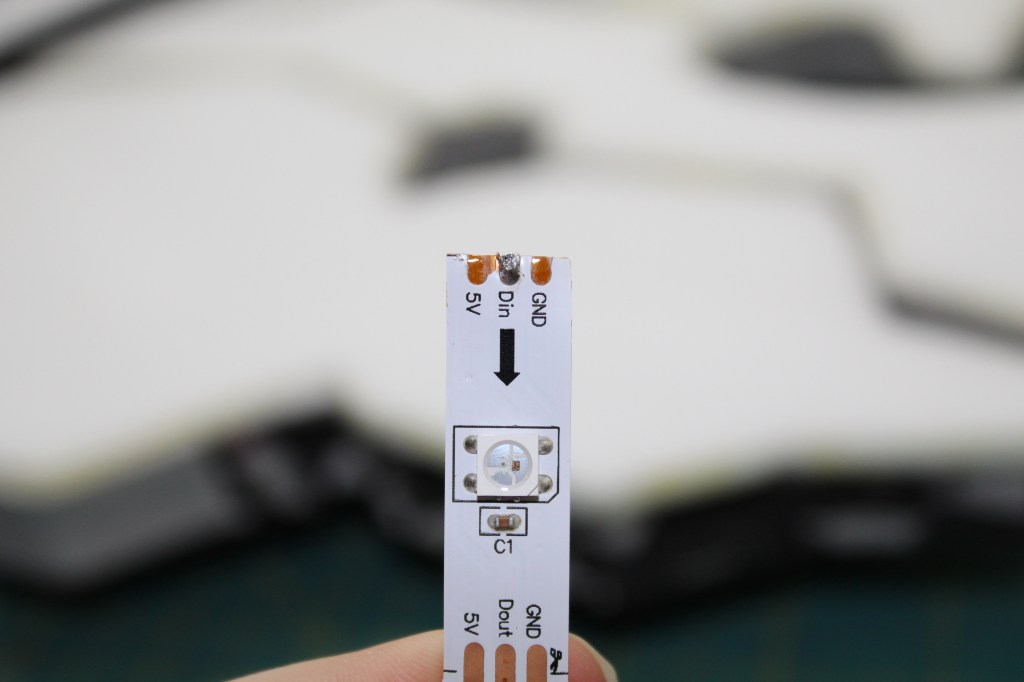
Measure and cut out your Neopixels strips.For Neoplxels you can cut between the Gnd, Dat, and the Pwd pads on each segment. Cut out your wire leads and solder them to your Neopixle strips. I use hot glue at the and of each solders point to help secure each joint.
** A note when soldering to these strips. If you keep iron on the copper pad to long the pad will come off the strip. I found that out the hard way in this build. The last 2 pictures are indication of what happened. The lights kept of blinking but no in the way I programmed it to. ***
damaged copper pads 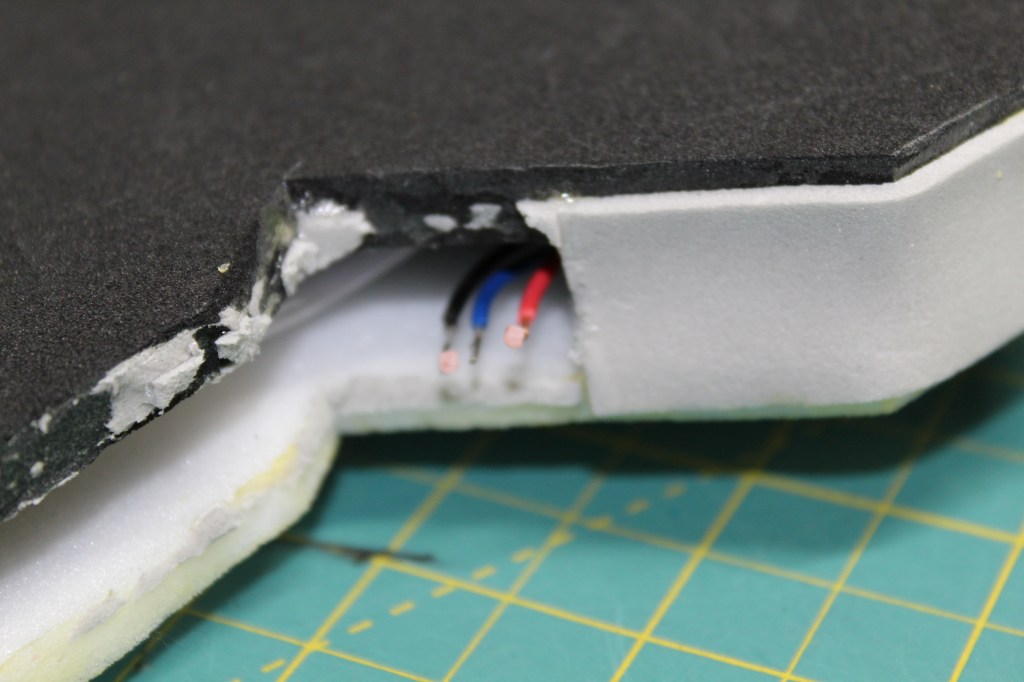
copper pads stuck on wires
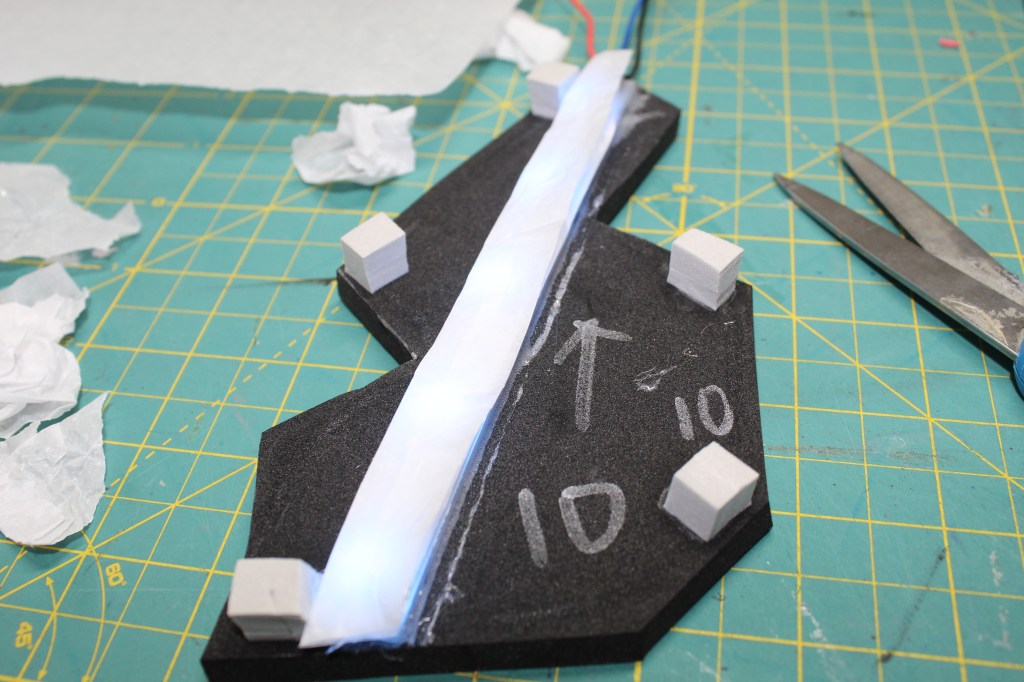
Hot glue the strips on the panels in the positions you want. I left the protective coating on the strips. I even took some sand paper to the covering to help with light diffusion.
Add 10mm spacers points on your panels. Hot glue parchment paper over the lights. I wanted these to be super diffused.

Trace and cut out the front panels from the Plastazote. Use 123 blocks to help line up both the light panels and the Plastazote. I used superglue to glue all these together. Test each strip along the way. This is the time to make any adjustments.
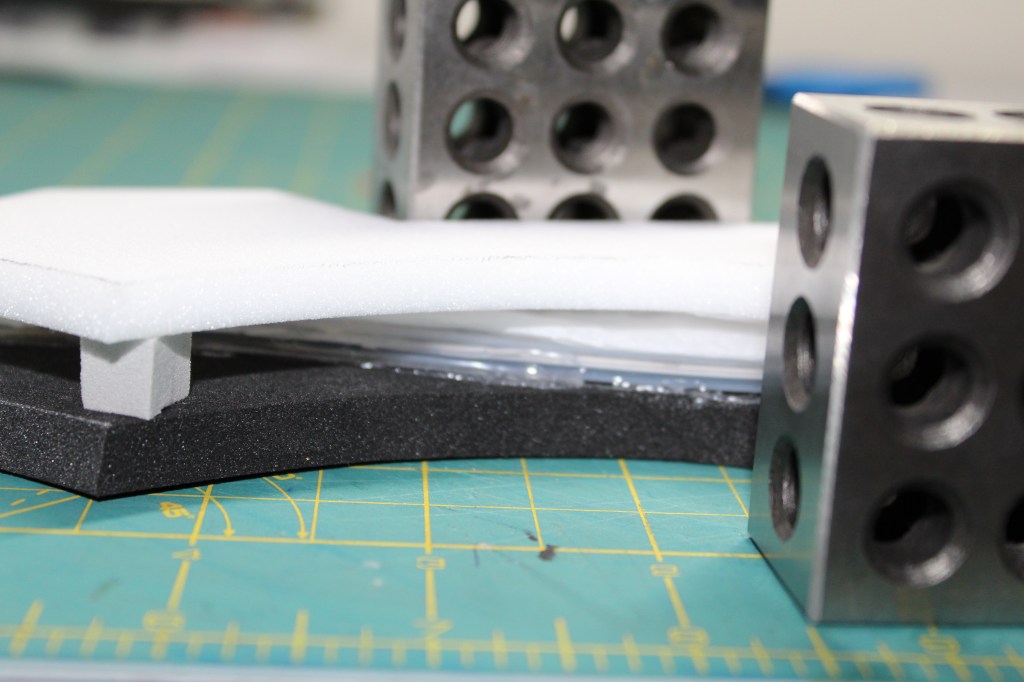
Cut out strips of 2mm foam and wrap the edges of the panels. This will help with the stability of the panels and prevent light bleeding out.

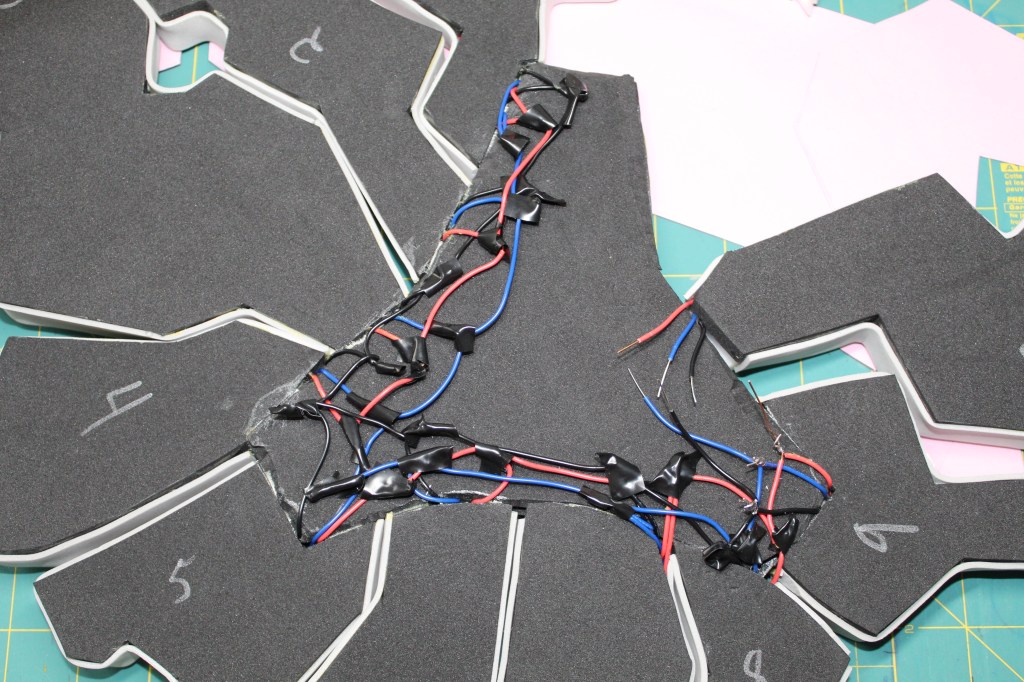

Glue the edges of each panel to the center points. Line up the edges with the registration mark on the center panels that were made earlier.
Solder together the led leads. Grounds together, Data together, and power together.
I did this in a series. Not sure why, If you do in parallel it would be fine.
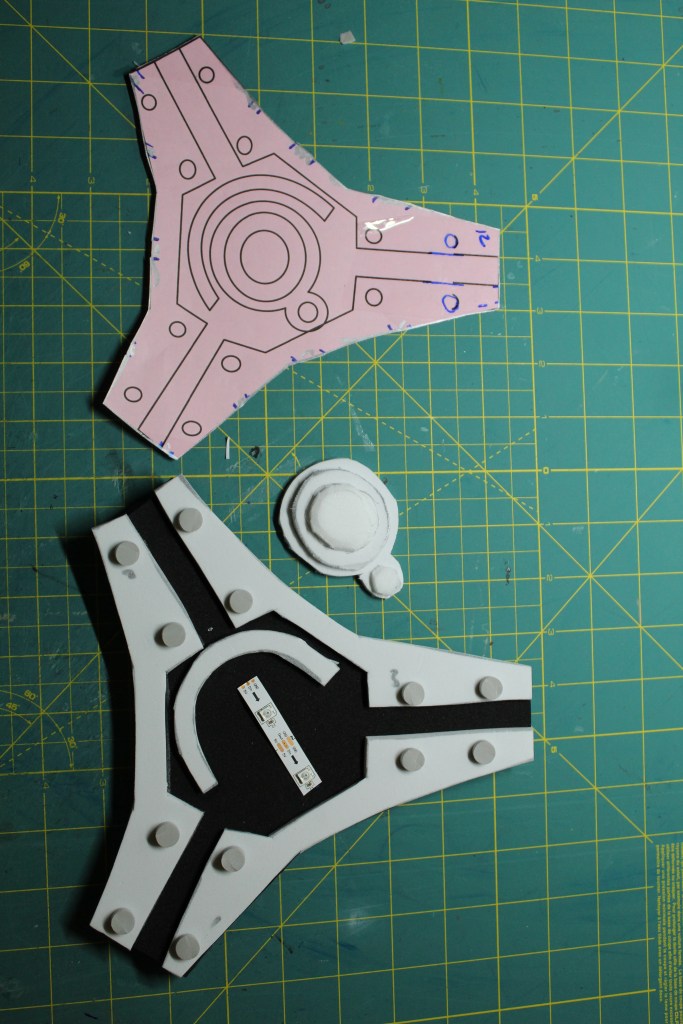

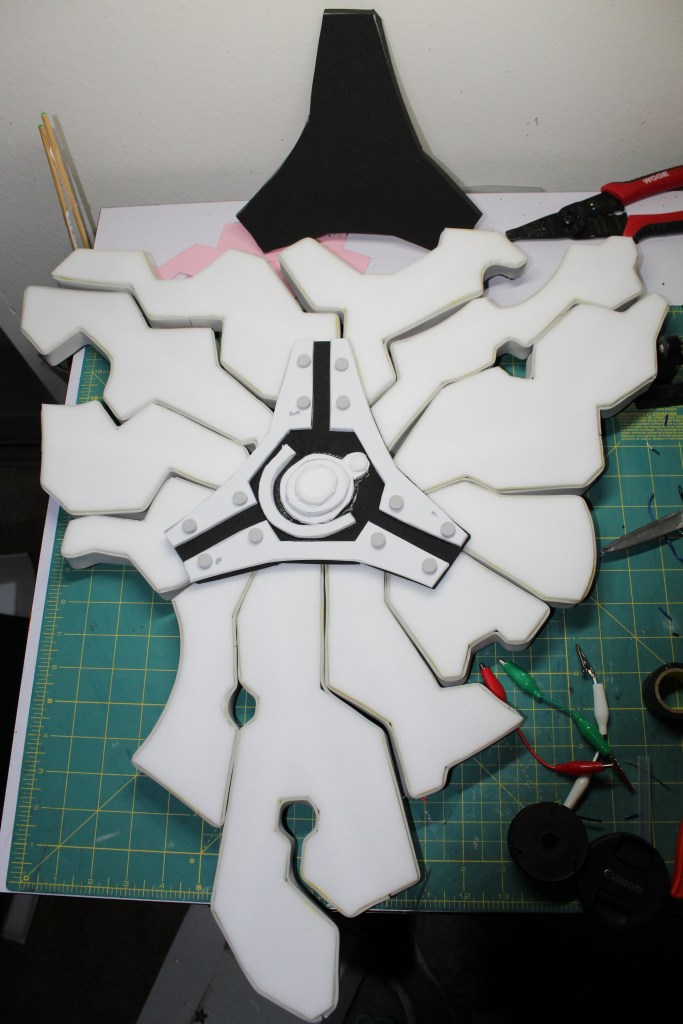
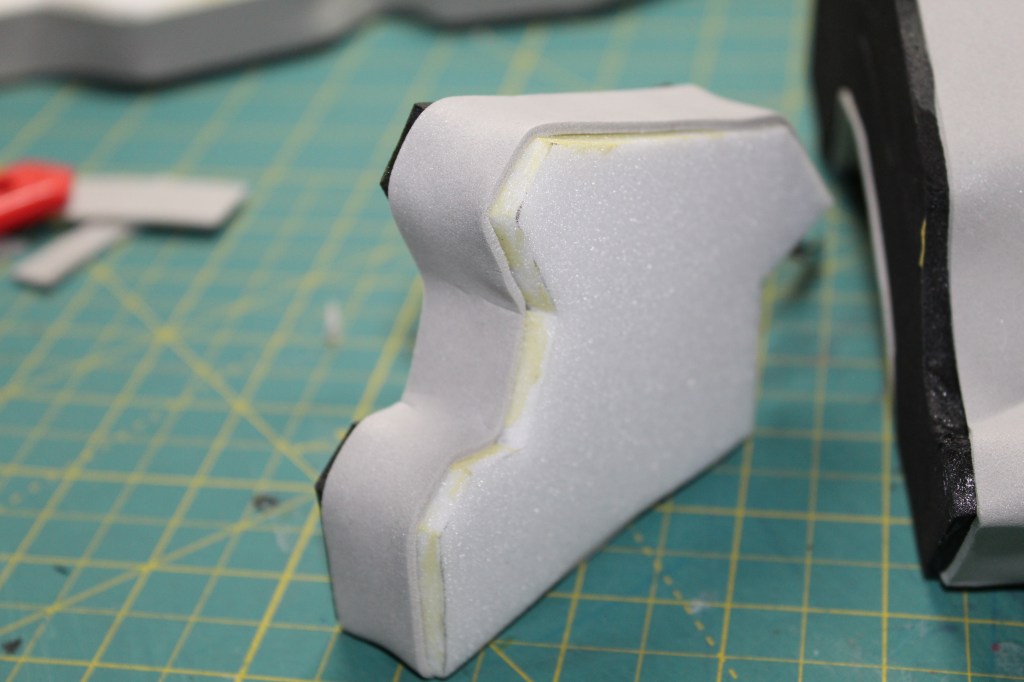
I made another version of the center design what is bigger. It will help hide the glue edges and help with stability. I used 4mm foam for the raised pieces and a foam dowel to make the rivets.
I also wanted to added lights here to. Poke a hole in the center to run your wire through.
Make a bigger cover for the back just like we did for the front only with is be plain.. Poke a hole and feed the 3 wires through and glue one the back. I did have to and more strips along on edges. I and some gaps where the wires were exposed.


Make a pocket for the battery and make a strap from EVA foam and velcro. I used 10mm foam for the batter to sit on and 2mm foam to keep it in place.
Make handles out of 10mm eva foam. You may need to double up near the edges for more security.
Solder the wires to D2, Gnd, and Vout on the Gemma MO board.
Last make a cove to protect the Gemma.
At this point it is best to heat seal the foam and get it ready for paint.


For the paint job I am going to try something different. I feel I should put that in its own instructions. Keep in eye out for that. It will be coming soon.
